How to: Looping Asset Animations
Hello, I'm Josie, the animator for Project Opera. Now that we have past our Alpha milestone, there are quite a few assets I will need to animate, especially the kind that run when you interact with it. For these assets, it's especially important that the animation loops seamlessly so they can repeat in succession as needed.
Step 1: Resting pose
For the first step in our looping animation, we need to pose our object in a way that makes sense. Make sure to key frame every bone on the first frame, even if it's a bone you don't think you will use later. Ensuring all bones have been keyed to the rest position on the first frame will make the last step easier.
This animation will be for the computer monitor that I want hanging down from the ceiling
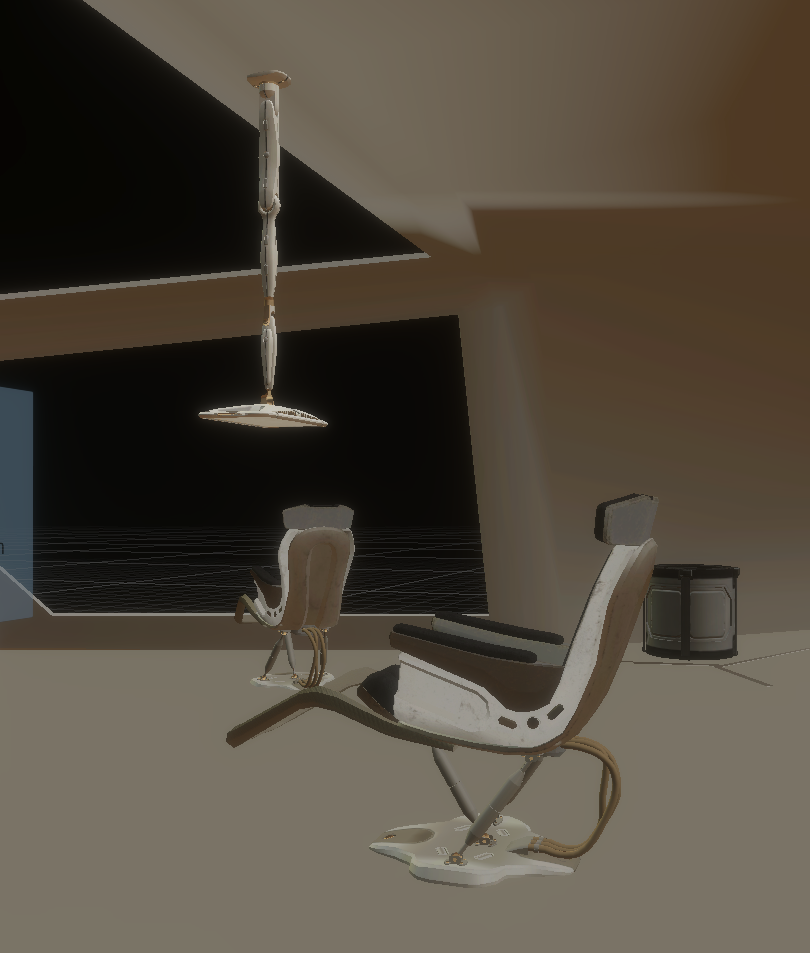
This is what it should look like in game without any animation
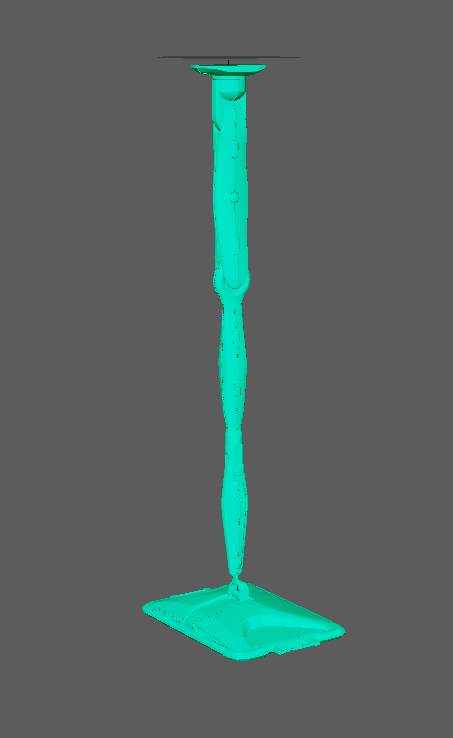
And this is what it looks like in Maya without animation. This pose however isn't appealing and needs to be changed. I'm going to move the bones of the arm to a resting position.
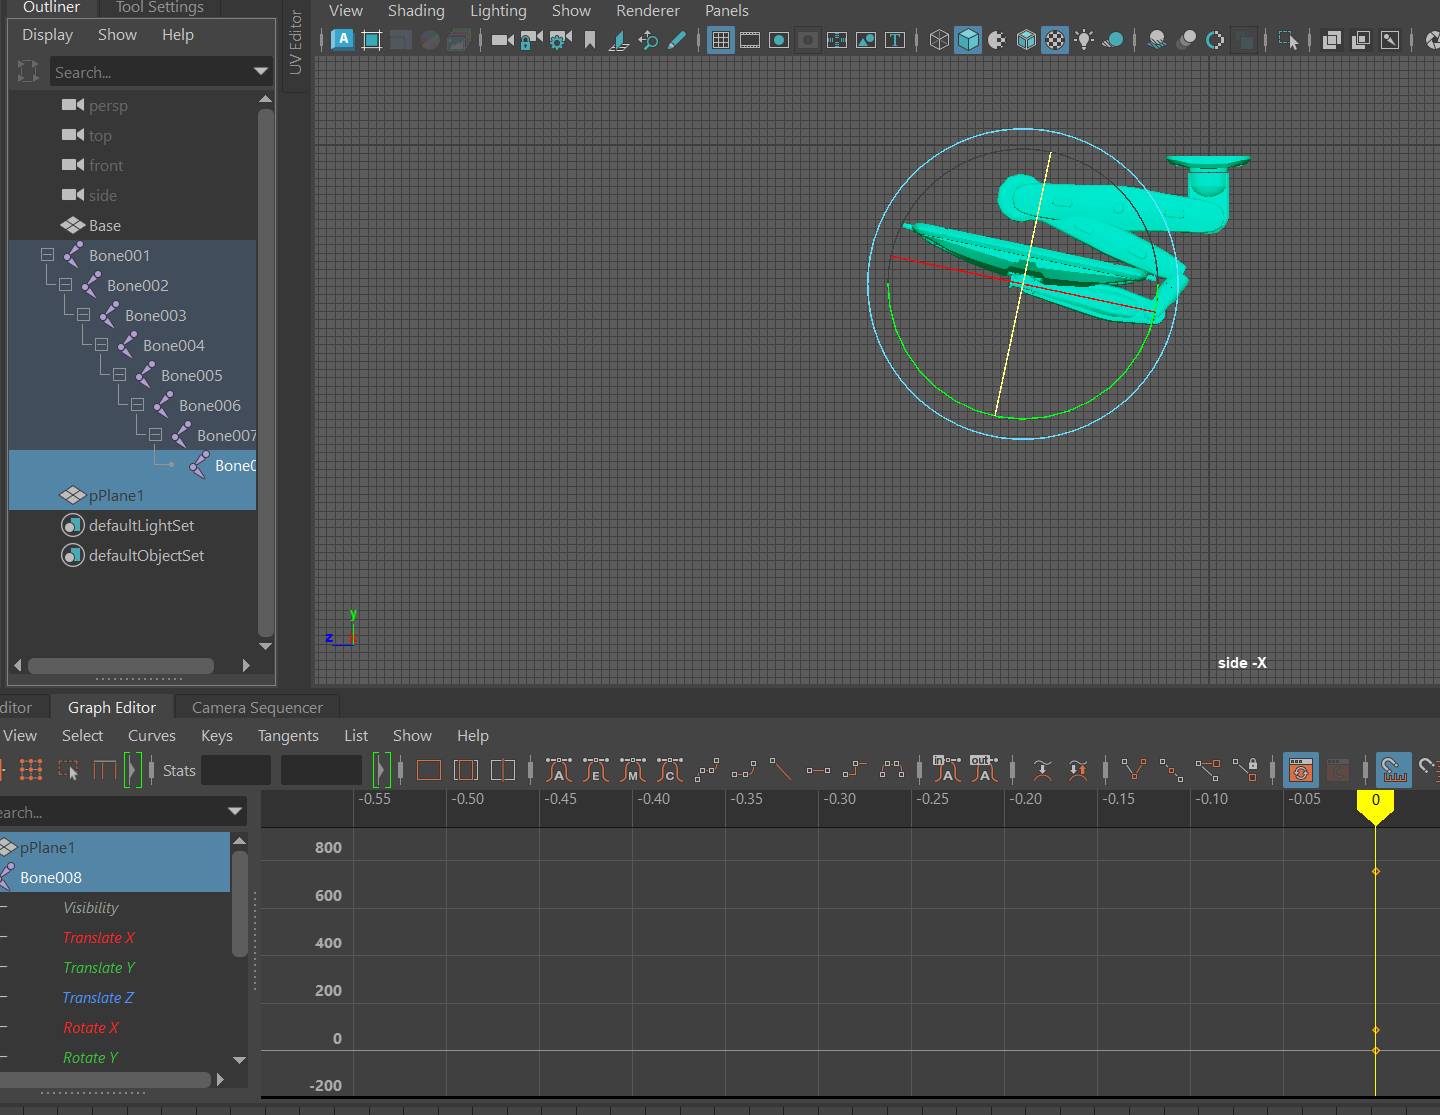
Much better, and you can see that I have selected all the bones, even though I didn't use bone 1 or 2, and keyframed this position at frame zero.
Step 2: "Open" Position
The "open" position of the animation will be when the arm is uncurled and ready to "use". I took a screenshot in Unity of the arm and chair in the space to use as reference in Maya.
For the reference image, I took a screenshot in Unity as side profile as I could. Back in Maya I made a plane and added a lambert to it. Change the color of the lambert to a file and picked my reference screenshot. From there, I lined up the reference arm with the modeled arm. It's not perfect but it gives me a good idea of the angle I want the arm to be in the open position.
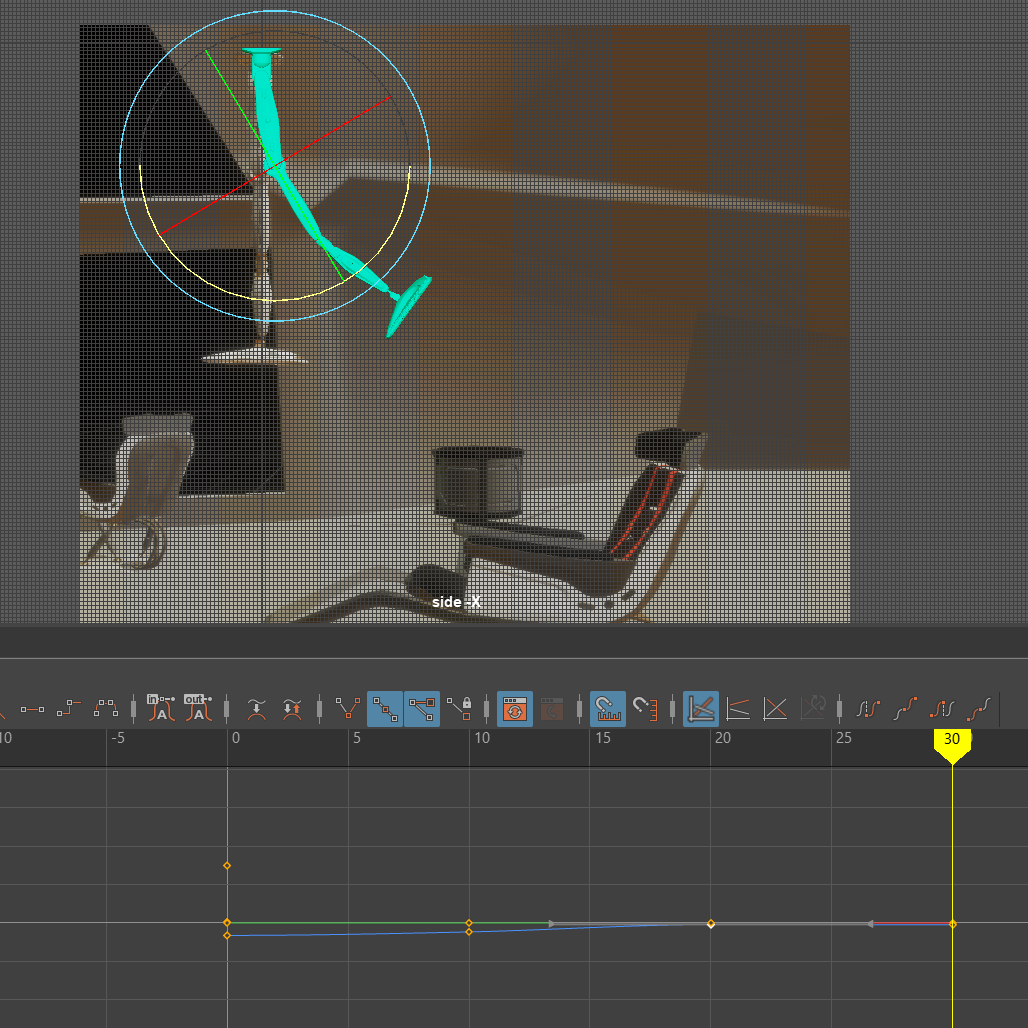
With the reference in Maya, it's a lot easier to estimate where the computer monitor should face.
For my open position, I had it only use 30 frames in 24fps, just a little over a second long. Your animation may be longer, you just need to use your best judgement. Smooth out any keyframes that seem unnatural and play the rest to open part of your animation a few times to make sure you're happy with it. You should also keyframe all bones, used or not, at your open position as well to make sure all your parts stay where they should.
Step 3: Make it Loop
There are many ways to make your animation loop, but one thing stays the same. ALWAYS make sure your last frame, no matter how long the animation, has the EXACT same keyframes as frame zero. This step is where keyframing all the bones in step 1 come in handy. Accidents happen and sometimes you move a random bone without noticing, keying all of them at frame zero not only help you notice it, but make sure the first and last frame remain consistent.
For the monitor animation, I wanted it to go back to it's resting position the same way it came back out, to achieve that I copy and pasted all the frames mirrored of the open pose frame. Mirroring isn't the only way to reset a loop however, use your imagination, and whatever way to get back to the reset position feels most natural, is the correct way.
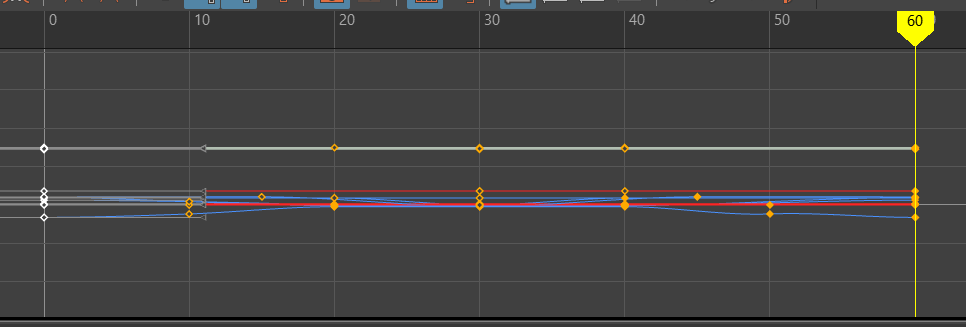
Here you can see my looped animation keyframes. Mirrored from the open position with copy pasted keyframes on the last frame from the first frame.
After you have you're loop keyed, play it back a few times and watch carefully for anything you think looks wrong. Even if you have the keys mirrors, something may still feel stiff and you will have to move a few keys on the timeline to get the look you imagined.


And watch your tangents, some may get turned in a way you don't like. Just click on it and rotate the tails or the tangents until your animation feels smooth
Step 4: Share your Animation with friends!
Now that you have a smooth looping animation you're happy with, screen record it and share it with you're friends and group members! Optionally you can also turn the video into a gif to show just how good you are at looping animations now!
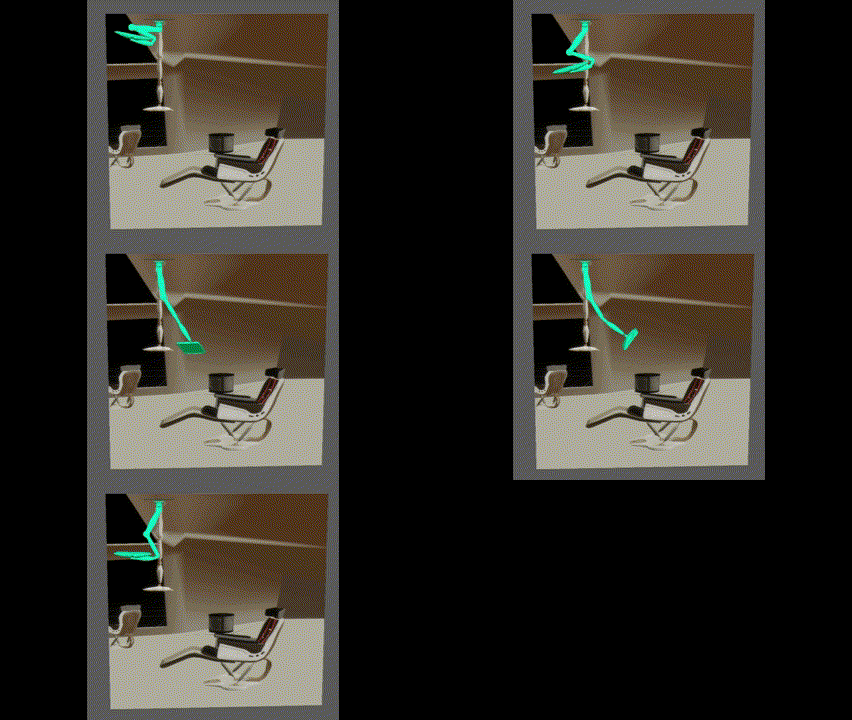
Happy animating!
Get Trade N' Transit
Trade N' Transit
Bringing Corn, Crops & Cryo to a Planet Near You!
| Status | Released |
| Author | ShadowRealm Studios |
More posts
- Machine Functionality: Part 2Jul 22, 2024
- How to make a tutorial!Jul 14, 2024
- Sci-Fi Planter AssetJul 09, 2024
- Texturing Techniques and Implementation: ExplodingJul 09, 2024
- Glow and Behold: Crafting Holograms with HDRPJul 02, 2024
- Machine Functionality: Part 1Jun 24, 2024
- Howto: On Click Unity AnimationsJun 24, 2024
- World space tutorial with type text effectJun 17, 2024
- Starry-Eyed Creations: Nebulas and Skybox MagicJun 04, 2024
Leave a comment
Log in with itch.io to leave a comment.