World space tutorial with type text effect


Hi there,
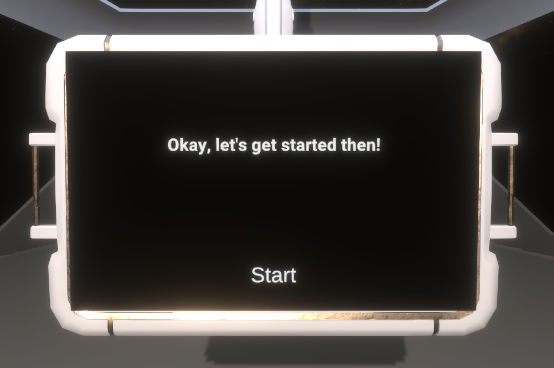
My name is Zeb. I'm the Lead Engineer on Trade N' Transit and I want to show you how I made a world space tutorial interface with a type-text effect like this:

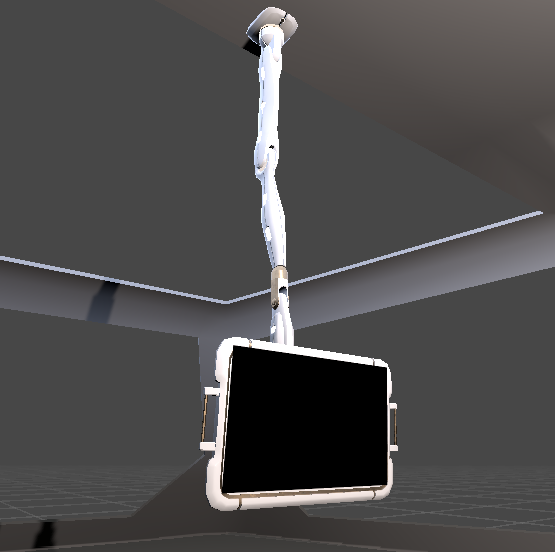
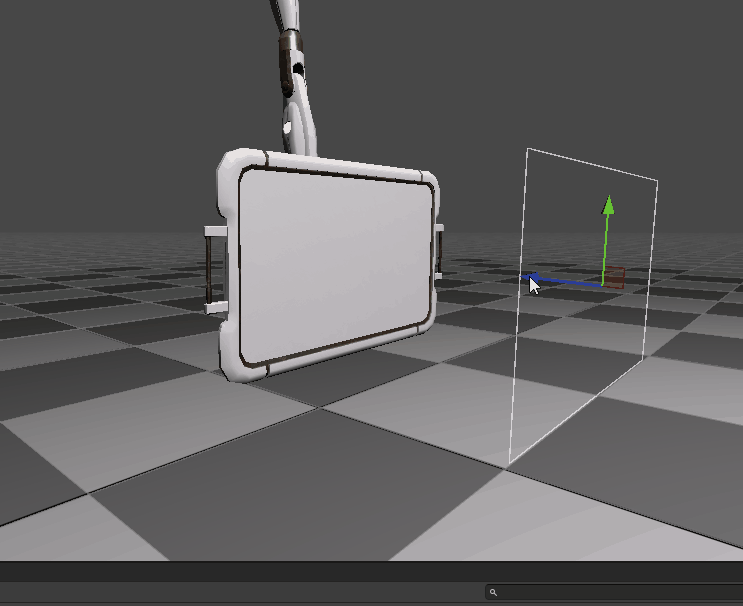
To begin with, it's nice to start with a prop such as this computer monitor that our artist Jacob Cooper kindly made for me.
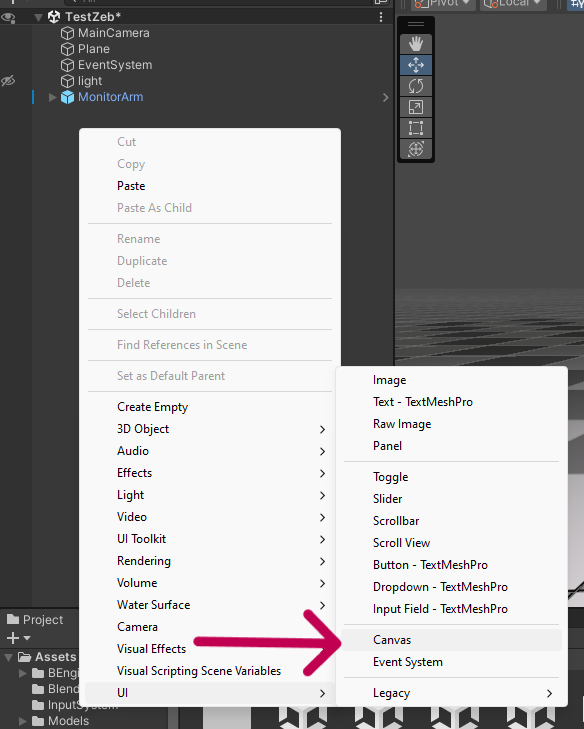
The first thing that we're going to do is make a canvas in the Unity hierarchy. It's important to make a new one even if you already have one in the scene because we're going to set it to world space which allows us to position it in front of the computer monitor screen.
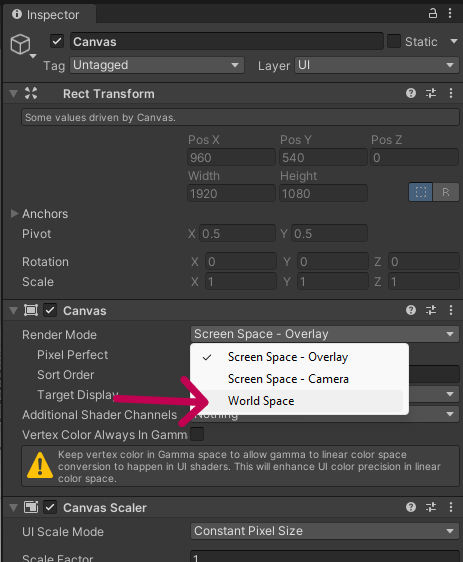
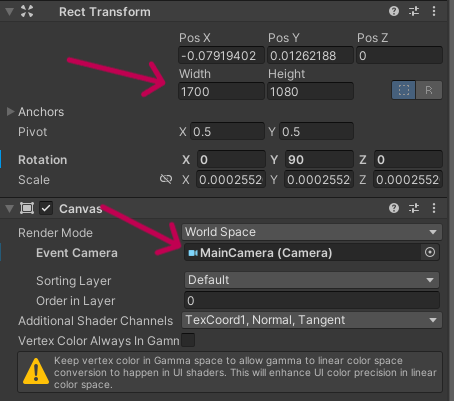
Next, we're going to set the canvas to world space. This lets us position it in the actual game world, rather than overlaying the game camera directly.
Now, it's very important to set the [Width] and [Height] of your canvas in its [Rect Transform] component to the final desired resolution of your canvas. I ended up choosing 1700x1080 for mine because it fit the prop screen well. It's also very important to set the [Event Camera] slot to a reference of the Main Camera in your scene, otherwise your clicks won't register. You can ignore the other values for now.
Next, you want to use the scale tool to bring your canvas all the way down to a reasonable size in your scene. I find it helpful to directly set the [Pos X] and [Pos Y] values to 0 in order to center the canvas in the scene. You also want to do this with your main prop, so that everything is nice and tidy when you align them.
Once your canvas is a reasonable size, we're going to align it with the screen of the prop like so:

Then, we're going to
- Add a panel to the canvas, and set its color to black, and its alpha to 100 so that it is fully opaque.
- Add a text field as a child of that panel, and resize it to have some margin on either side.
- Set the [Font Size] to [Auto Size] and clear the text field entirely so that the monitor starts blank.
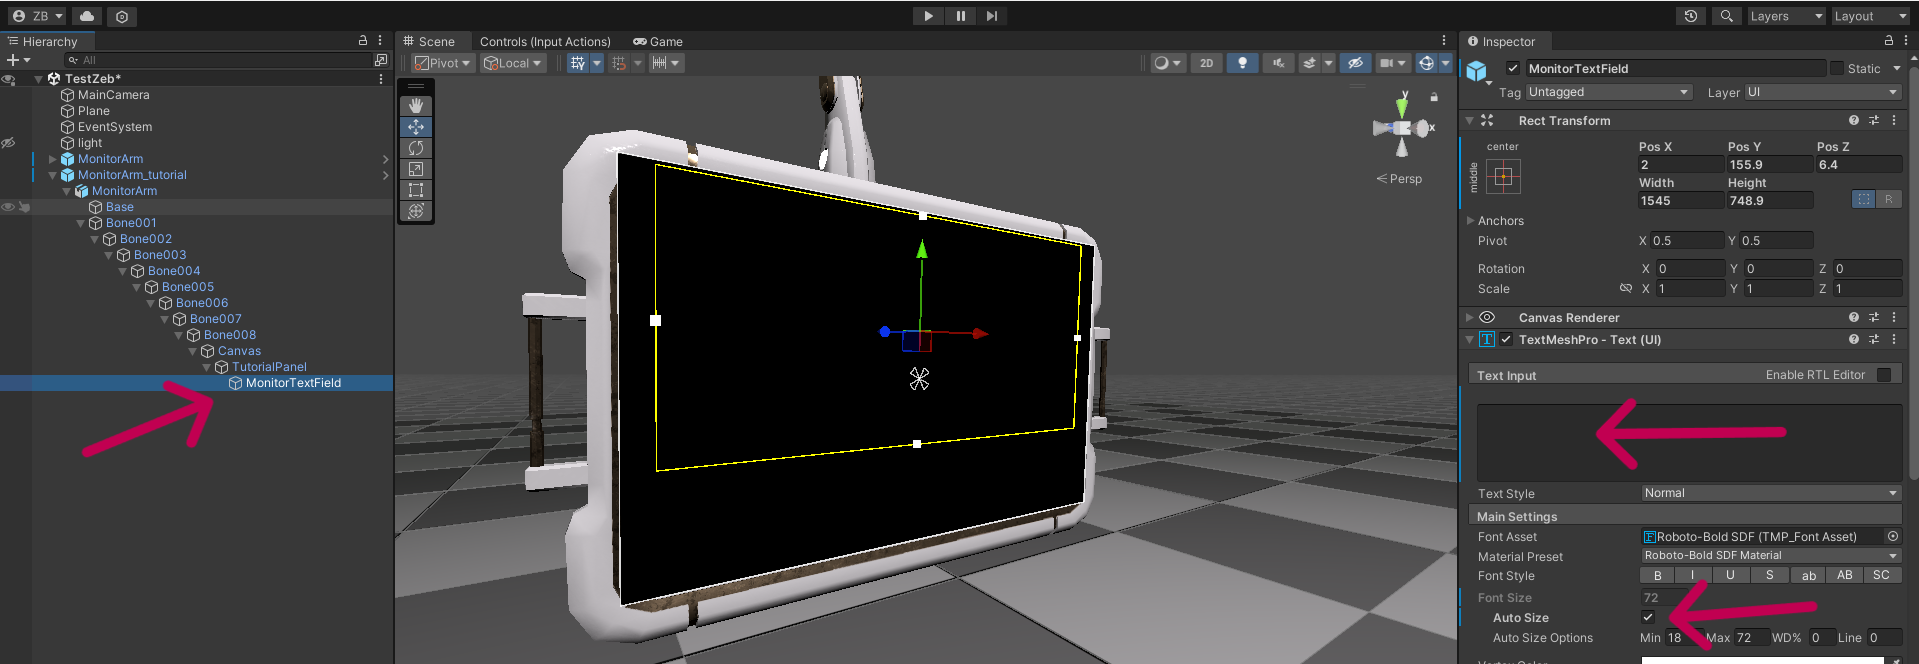
Make sure you're naming everything meaningfully!
At this point, I recommend making sure that your canvas and text are displaying properly. If they are backwards, you may need to rotate your canvas 180 degrees to flip it around.
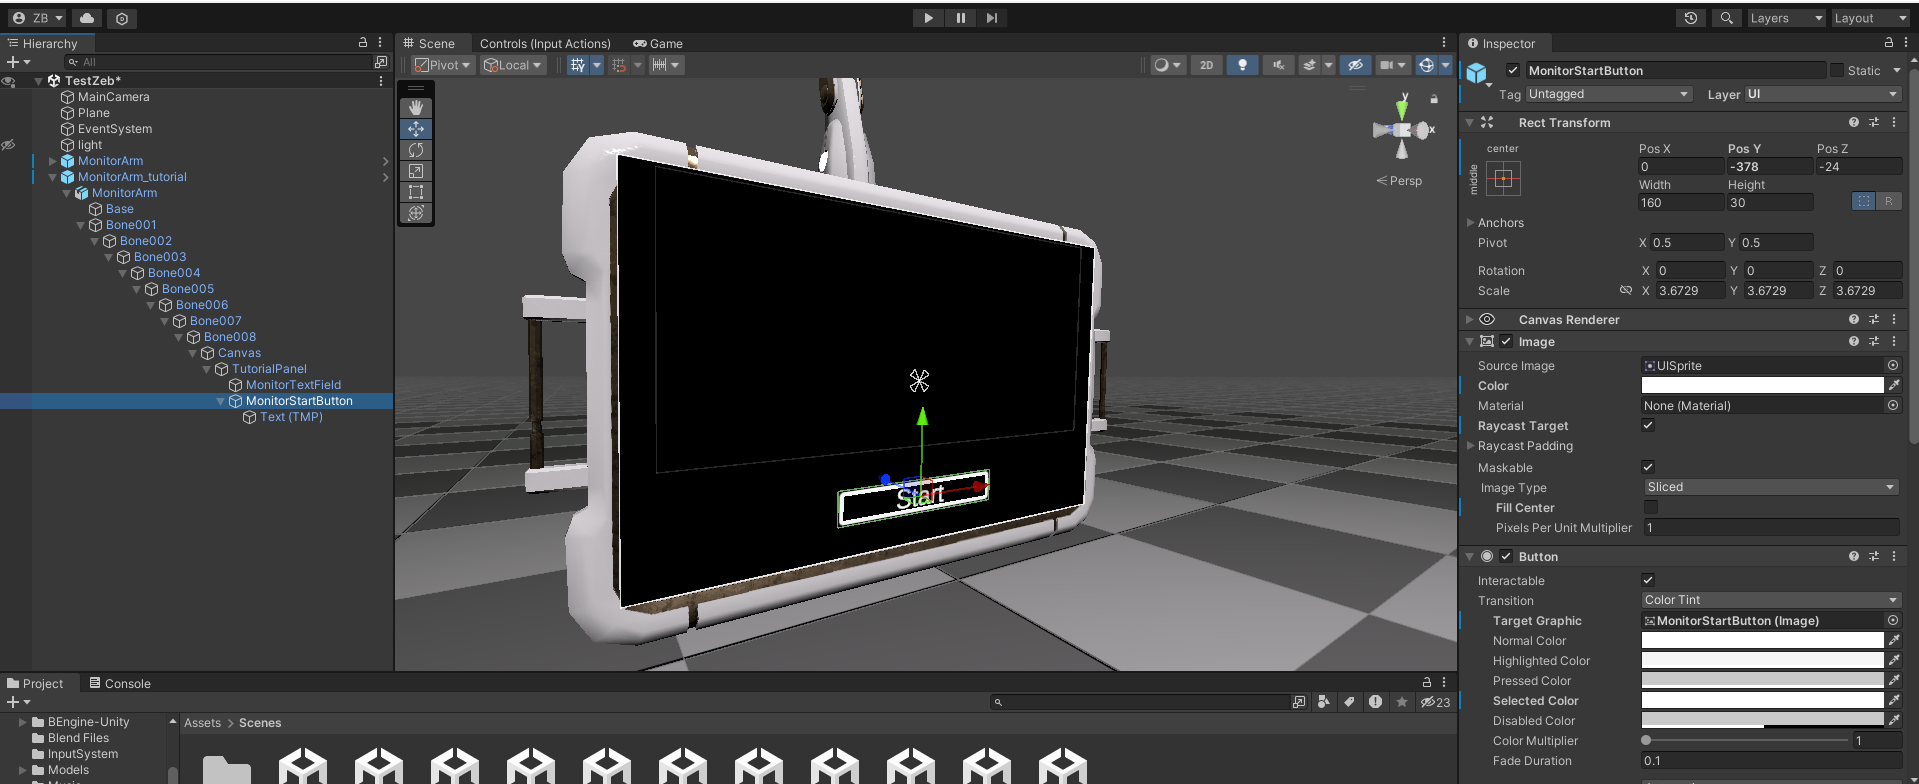
Next, we're going to add a button, resize it and place it in the lower center portion of the interface. Mine is stylized, but yours can be the default button for now.
Now it's time to code!
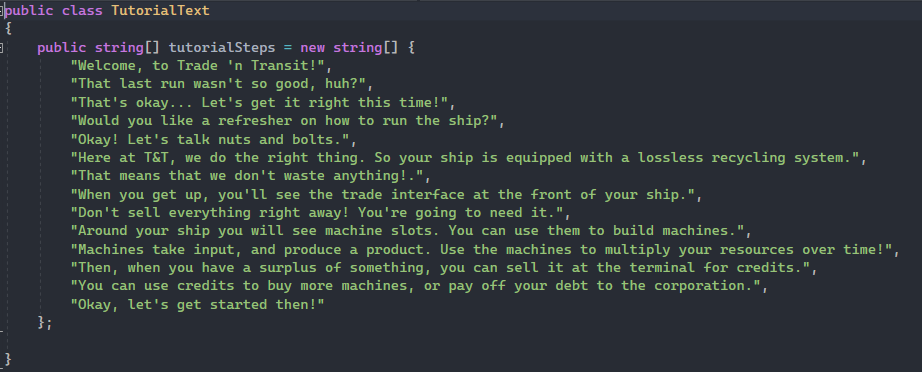
Let's create a C# class which we will place onto our Canvas called MonitorInterface.cs. It's going to need the following references:

- [textField] is going to be the main field of text where we put our typing words.
- [nextButton] is going to be the main button on the interface which will move us forward one index in our messages.
- [textSpeed] is the speed at which our text displays in seconds per letter.
- [currentTutTextIndex] is a counter to keep our position.
- [endTutorialTextIndex] is the last index of the array of strings which we haven't created yet. We're going to set this at run time.
Lastly, we have [tutText] which is a mysterious type called TutorialText. What is that you might ask? Well, it's a custom C# class which is going to hold our text data. This lets us containerize that part of the code, and place it into its own area which is a better programming practice than having everything inside of a single class. It looks like this:
There are a couple of different ways to approach this, but this is how I chose to do it. This is a single non-monobehaviour inheriting class which stores a single list of strings called [tutorialSteps]. This makes it much safer for an artist to add some lines to the tutorial! Next, we're going to add the following code to the MonitorInterface.cs class:
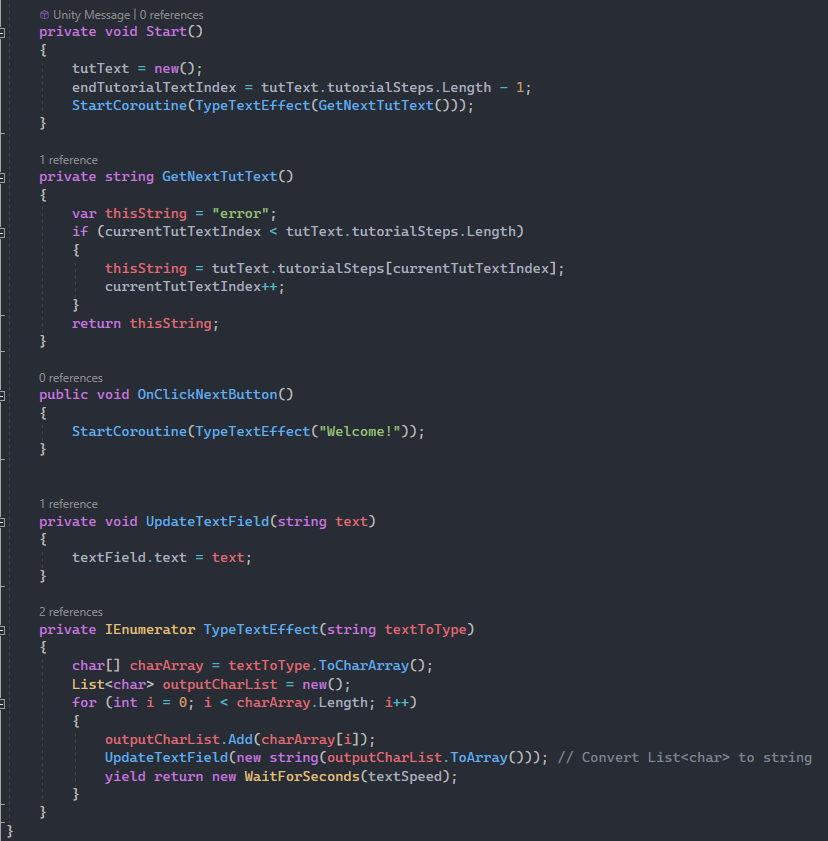
That's a lot going on! Let's break it down.
- Inside of Start() we're instantiating a new instance of the class TutorialText and assigning the new instance to a local variable called [tutText]
- Then, we set the value of [endTutorialTextIndex] to the return value of the expression: tutText.tutorialSteps.Length - 1
- Next we start a coroutine called TypeTextEffect() and pass into it the return value of a method called GetNextTutText(). What does that mean? Let's skip to the definition of GetNextTutText().
- Inside of GetNextTutText() we set a placeholder string to the value "error". Then, use an if statement to check whether or not the current counter index is within the size of the array of strings that [tutText] holds. This prevents an out of bounds exception from being thrown.
- Then, inside of the if statement we assign out local variable [thisString] to the value of the corresponding [tutText] array index.
- Then, we increment our counter once.
- Finally, we return the placeholder string value, which should equal the next piece of tutorial text.
- The coroutine which we are passing this string value into is defined at the bottom of the last screenshot.
- This corouting takes the string and splits it into an array of chars.
- Then, it declares an empty list to place the output chars into.
- Next, we use a for loop it iterate over the array of chars, and one by one we add their values into the output list.
- Every iteration, we are also updating the text field on the monitor with the new list value. This is what creates our typing effect!
- Then, inside of the for loop, we are also waiting for a number of seconds which corresponds to our [textSpeed] variable.
With any luck, this should create a typing text effect. Lets play it in the editor and see.
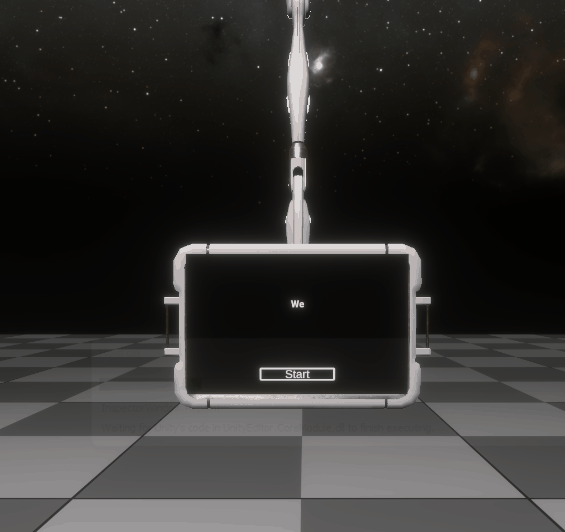
Hooray!
Next, you could extend this to use button functionality, or even use a state machine to make an interactive tutorial.
I hope that was helpful. See ya!
Leave a comment
Log in with itch.io to leave a comment.